
diff options
| author | Pinapelz <yukais@pinapelz.com> | 2024-08-24 13:27:34 -0700 |
|---|---|---|
| committer | Pinapelz <yukais@pinapelz.com> | 2024-08-24 13:27:34 -0700 |
| commit | 43bf9b4ec31ed8e1b3edcfa6c50dcaef278111b0 (patch) | |
| tree | a4e1895afc0d8562a28fbfe39c4ee9324376e821 | |
| parent | 16cfb642db302955bfde4ef79fcb9fd66114c5e5 (diff) | |
ffxiv-gil-making: Eureka Bunnies
| -rw-r--r-- | src/content/blog/ffxiv-gil-making.mdx | 88 |
1 files changed, 83 insertions, 5 deletions
diff --git a/src/content/blog/ffxiv-gil-making.mdx b/src/content/blog/ffxiv-gil-making.mdx index 89c642c..1eda7b5 100644 --- a/src/content/blog/ffxiv-gil-making.mdx +++ b/src/content/blog/ffxiv-gil-making.mdx @@ -38,7 +38,7 @@ You can expect to make around 5.5k to 6k gil per run. As there are 19 enemies pe This is a consistent method since its farming raw gil, but requires a levelled Blue Mage with some pre-requisite spells. -I'd reccomend looking up a video guide on how to do this since there is a bit of technique involved in how to minimize the time +I'd recommend looking up a video guide on how to do this since there is a bit of technique involved in how to minimize the time per run and what spells to bring. - **Overall:** Its not the most terrible thing since to earn 100K an hour, but it'll be an excrusiatingly boring hour of pure grind. @@ -187,8 +187,8 @@ make quite a bit in a fair amount of time. So long as the glamours are still wor --- # Eureka -The methods below all involve Eureka. If you're still new to Eureka then I'd reccomend maxing out your elemental level (level 60) before doing these methods -(although this is just a reccomendation and some still can be done without maxing). +The methods below all involve Eureka. If you're still new to Eureka then I'd recommend maxing out your elemental level (level 60) before doing these methods +(although this is just a recommendation and some still can be done without maxing). Notorious Monsters (NM) are essentially FATEs that spawn in Eureka zones. Its important to note that these generally have a 120 minute cooldown per instance they are killed in, meaning they cannot spawn again until then (with the exception of Bunnies which will be touched upon later). @@ -285,10 +285,88 @@ otherwise you'll miss out on the ring if you happen to get it - **Overall:** A very predictable way of having a chance to make big gil. Set an alarm for when the weather changes to match the conditions and hop into Eureka. -# Eureka Bunnies WIP +# Eureka Bunnies *Minimum Elemental Level 20 required. But its best to be Elemental Level 35+* -Eureka Bunnies are a special type of NM that don't require any weather condition or prep to spawn. The earliest bunny +Eureka Bunnies are a special type of NM that don't require any weather condition or prep to spawn. They also only have around a 8-15 minute cooldown +meaning that they are highly repeatable. + +Completing a Bunny NM will give you the `Down the Rabbit Hole` buff for 15 minutes and also gives you a `Happy Bunny` which +follows you around. + +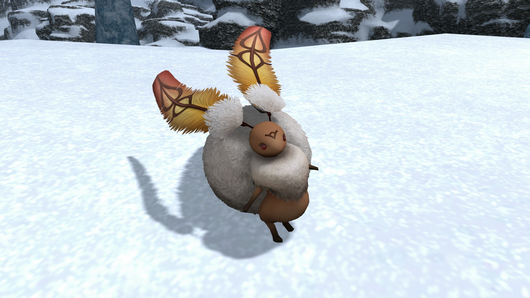 + +The goal is to follow the Happy Bunny to a hidden chest that has spawned somewhere in the zone (this is initially invisible to the player). + +To help you find the chest, you will get a `Lucky Carrot` as a key item (easily accessible from the side panel). Use this item and the Happy Bunny +will give you a hint as to the general direction of where the chest is. + + + +You have to be within close proximity of the chest, and then use the `Lucky Carrot` to be able to see the chest. + +**Each chest will award some amount of raw gil, some 4.0 era materia (V and VI), some logograms, and possibly a "rare" item.** +We're primarily after the logograms and rare items here, the gil is a nice bonus on top of all that. + +When you find a chest, it has the chance to be 1 of 3 types: +- Bronze Chest: 10 000 Gil +- Silver Chest: 25 000 Gil +- Gold Chest: 100 000 Gil + +As you can probably guess, the rarity of the chest goes Bronze, Silver, Gold. There are some speculations on what the exact rates are but I'll say that +Gold chests are noticeably rarer than Bronze or Silver. + +I'll go into a detail about each zone and what you're mainly looking for, its recommend that you are max elemental level in the respective +zone before attempting to farm these: + +## Pagos Bunnies +- There's a Northern and Southern Bunny FATE in Pagos. Don't bother doing Northern Bunnies since the locations the Bunny brings you to are extremely dangerous +even at max elemental level and hard to get to (i.e Louhi's Cave). It's better to wait for the Southern Bunny to re-spawn + +| Coffer | Notable Items | +|----------|----------| +| Bronze | Nothing, but at least you still get 10K gil | +| Silver | Nothing, but at least you still get 25K gil | +| Gold | <a href="https://na.finalfantasyxiv.com/lodestone/playguide/db/item/278693f87ee/" class="eorzeadb_link">Copycat Bulb Minion</a>, Hakutaku Eyes | + +There's 5 types of eyes, 4 of which you get from doing Bunnies. The prices vary but usually the <a href="https://na.finalfantasyxiv.com/lodestone/playguide/db/item/d6fe6f9f86b/" class="eorzeadb_link">Burning Hakutaku Eye</a> are worth the most. + +| | | +|----------|----------| +| <FFXIVItemPrice client:load itemId={23027} itemName="Copycat Bulb" itemImageUrl="https://www.garlandtools.org/files/icons/item/59690.png" /> | <FFXIVItemPrice client:load itemId={23214} itemName="Burning Hakutaku Eye" itemImageUrl="https://www.garlandtools.org/files/icons/item/21280.png" /> | + +## Pyros Bunnies +- Same as Pagos, there's a Northern and Southern Bunny FATE in Pyros. Always go for the Southern Bunny and wait for it to re-spawn +- This is also where Logograms start to drop, people running Baldesion Aresenal will be looking to buy these + +| Coffer | Notable Items | +|----------|----------| +| Bronze | Nothing, but at least you still get 10K gil | +| Silver | <a href="https://na.finalfantasyxiv.com/lodestone/playguide/db/item/449ad76fb82/" class="eorzeadb_link">Archaeodemon Horns</a>, <a href="https://na.finalfantasyxiv.com/lodestone/playguide/db/item/71489598fd9/" class="eorzeadb_link">Modern Aesthetics - Form and Function</a> | +| Gold | <a href="https://na.finalfantasyxiv.com/lodestone/playguide/db/item/cb1d264d373/" class="eorzeadb_link">Eldthurs Horn</a> , <a href="https://na.finalfantasyxiv.com/lodestone/playguide/db/item/71489598fd9/" class="eorzeadb_link">Modern Aesthetics - Form and Function</a>, <a href="https://na.finalfantasyxiv.com/lodestone/playguide/db/item/144e48a2076/" class="eorzeadb_link">Offensive Logogram</a>, <a href="https://na.finalfantasyxiv.com/lodestone/playguide/db/item/ec9ce7dd1c2/" class="eorzeadb_link">Protective Logogram</a> | + +| | | +|----------|----------| +|<FFXIVItemPrice client:load itemId={24219} itemName="Eldthurs Horn" itemImageUrl="https://www.garlandtools.org/files/icons/item/26038.png" />|<FFXIVItemPrice client:load itemId={24233} itemName="Modern Aesthetics - Form and Function" itemImageUrl="https://universalis-ffxiv.github.io/universalis-assets/icon2x/24233.png" />| + +## Hydatos Bunnies +- There's only 1 Bunny FATE in Hydatos, so you'll have to wait for it to re-spawn + +- Even at max elemental level, the enemies in this Bunny FATE are pretty tough so be careful + +- Bronze coffers are actually good since they can drop <a href="https://na.finalfantasyxiv.com/lodestone/playguide/db/item/ec9ce7dd1c2/" class="eorzeadb_link">Protective Logograms</a> + +| Coffer | Notable Items | +|----------|----------| +| Bronze | <a href="https://na.finalfantasyxiv.com/lodestone/playguide/db/item/ec9ce7dd1c2/" class="eorzeadb_link">Protective Logogram</a> | +| Silver | <a href="https://na.finalfantasyxiv.com/lodestone/playguide/db/item/8e0e852c561/" class="eorzeadb_link">Mitigative Logogram</a> (Guaranteed) | +| Gold | <a href="https://na.finalfantasyxiv.com/lodestone/playguide/db/item/144e48a2076/" class="eorzeadb_link">Offensive Logogram</a> (Guaranteed), <a href="https://na.finalfantasyxiv.com/lodestone/playguide/db/item/d0f29772578/" class="eorzeadb_link">Eurekan Petrel Horn</a> | + +| | | +|----------|----------| +|<FFXIVItemPrice client:load itemId={24630} itemName="Eurekan Petrel Horn" itemImageUrl="https://www.garlandtools.org/files/icons/item/26038.png" />|<FFXIVItemPrice client:load itemId={24011} itemName="Protective Logogram" itemImageUrl="https://www.garlandtools.org/files/icons/item/20036.png" />| + +- **Overall:** Excellent method. You make some amount of consistent gil and have a chance at some very valuable items. Its also always available to do and highly repeatable! # Time Sensitive/Seasonal Things These are a few things that are worth doing but are only available during certain periods of times. It doesn't necessarily mean they |